Lippage control systems– a toy or a tool for tiling?
Helping to understand the tile installer’s perspective on lippage and how it can be mitigated

A novice to tile work looking at a new tile installation today might comment, “When did LEGO* pieces start being used to install tile?" Yet we see these little plastic devices being used more frequently for porcelain and stone tile installations. What are they and why are they important for our industry?
First, we have to understand why they are used. I can remember that back in the early 1980’s a large tile was 8 x 8 inches. Today, tiles are being produced in 2 x 2, 1 x 4, 2 x 4 feet, etc. There are even large porcelain panels up to 5 x 10 feet being produced. And manufactured tiles are being rectified (natural stone has always been cut to precise size), so grout joints can be minimized to 1/8 inch or even 1/16 inch. With such narrow grout joints in the field of such large tiles, it becomes very difficult and time consuming to eliminate lippage between tiles.
What is lippage? The TCNA Handbook defines lippage as, “The condition where one edge of a tile is higher than the adjacent tile, giving the finished surface an uneven appearance.” For stone tile, the acceptable industry standard for lippage between adjacent tiles is 1/32 inch. For porcelain tile, the acceptable lippage can vary depending on the width of the grout joint, either 1/32 or 1/16 inch.
Why is lippage a problem? Customers expect to get a perfectly flat floor or wall surface. Lighting, natural or otherwise can cast shadows on tile work with lippage — deemed unsightly by the owner. And customers want to slide a quarter or half dollar across a floor without it “popping up” from hitting the lipped edge of a tile. To fix lippage, you have to tear out and replace the tiles — an expensive proposition.
The “old timer” tile contractors will look at lippage control devices and say, “If you need these things, you aren’t a good installer.” That may be true to some extent, but lippage control systems will provide a means to achieve the desired result: eliminate lippage between tiles more quickly and efficiently than doing the work “by eye.”
There are many types of lippage control systems on the market. You can categorize them into three sub-types:
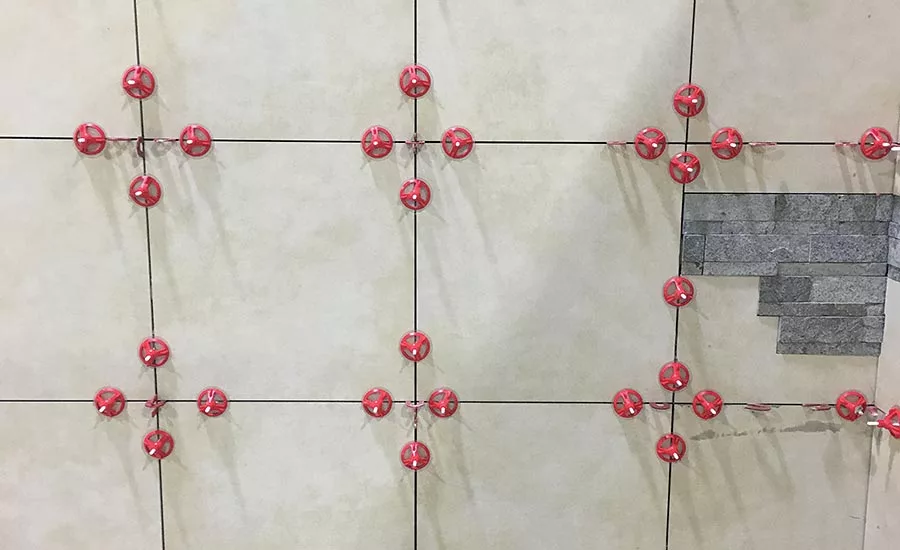
Wedge System — These use a slotted anchor stem that slides into the grout joint. Then, a wedge is pushed into the open slot of the stem and forced into place by pushing with fingers or with a plier-like tool. Most wedge systems require positioning around a grout joint intersection, and additionally, along the sides of a large tile. There are some wedge systems that can be used right in the intersection of the grout joint.
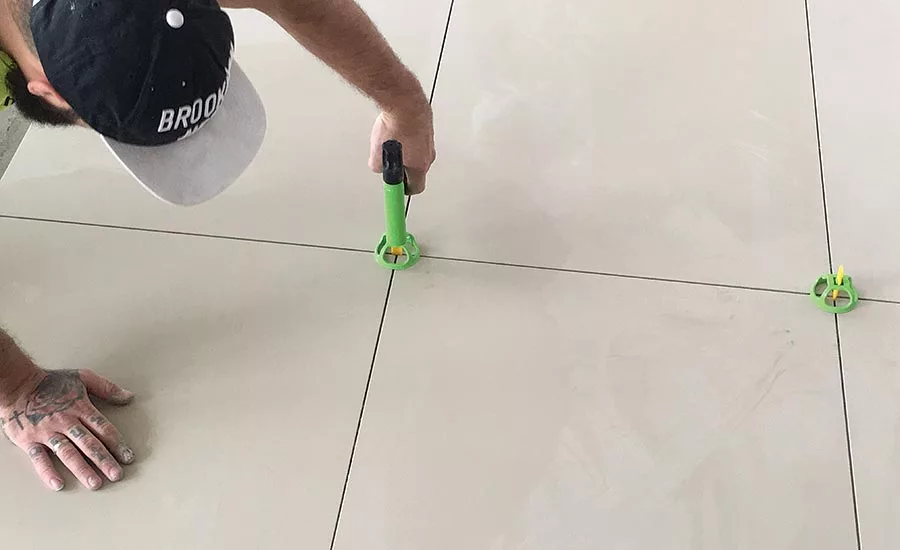
Screw Cap Systems — These use a threaded anchor stem that slides into the grout joint. Then, a cap is screwed down on the stem so that it pushes down on the adjacent tiles to flatten the surface between the tiles. Most screw cap systems are screwed down by hand, though some can make use of a drill. Also, most screw cap systems require positioning around a grout joint intersection, and additionally, along the sides of a large tile. There are some screw cap systems that can be used in the intersection of the tiles.
Cap Push Down Systems — These systems use an anchor stem that slides into the grout joint intersection. A cap is put on the stem and is pushed down by a tightening tool so that the cap pushes down all corners of the tiles so they are flush.
Additional thoughts
- For many systems, the anchor stem also functions as a spacer, thus eliminating the need for a separate tile spacer. But some systems do not provide joint spacing so a separate tile spacer will be needed.
- In all systems, the tightening component (wedge or cap) is removed along with the protruding part of the anchor stem so that grouting can be done. The base of the anchor stem remains in the hardened thinset mortar below the tile.
- The tightening component (wedge or cap) is re-usable. The number of uses depends upon how careful the contractor is for removal recommendations. (No sledge hammers please!)
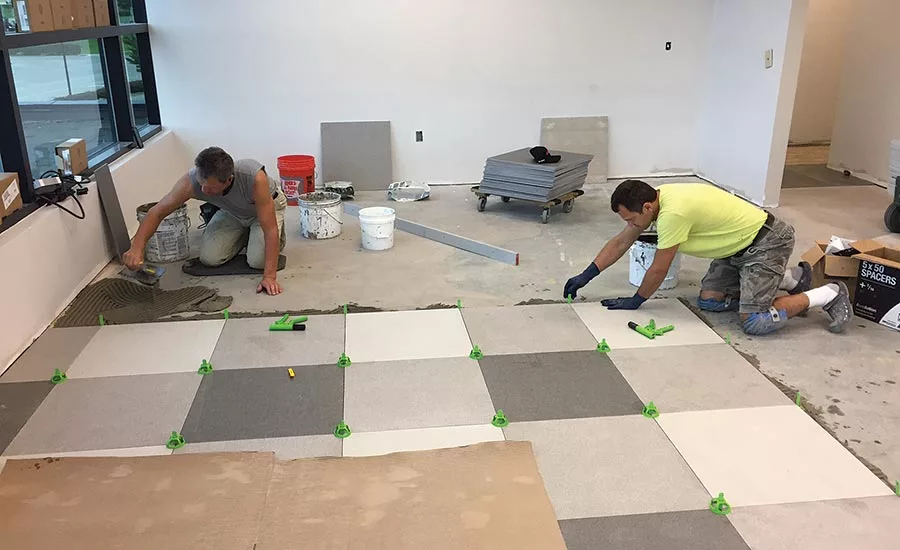
- In no way is any lippage control system a substitute for proper installation practice, such as back-buttering large-format tiles and using the proper size notched trowel.
- Surface preparation is also very important with large-format tiles. Self- leveling underlayments and other patching compounds must be used to ensure the substrate is sufficiently flat to accommodate the size of the tile.
How to choose the best lippage control system? There seems to be new lippage control systems coming out every month. Here are a few tips for contractors to make the right selection:
- Not all systems are created equal. All have strengths and weaknesses. For example, some systems can scratch a soft stone when installed. Others can twist or move tiles out of position and require more labor to fix. It is best to give a system a fair shake and test on a job to see which system works best for you.
- Make sure to read the directions and/or contact the manufacturer to make sure you are using the system properly.
- Don’t compare the price of systems’ components (“Hey, this anchor stem is $0.03 less than the other brand so I’ll buy this.”) Look at the total cost of the pieces you need to do the entire job. Example: Systems that surround the intersection use three to four times more pieces than systems that go into the intersection. That means you are buying far more pieces to do the same square footage of installation. Total installation cost is what counts.
- Productivity/labor cost is far more important than the cost of the lippage control systems. If you are able to install 20%, 30%, 40% or more tile in a day with one system vs. another system, you are saving a lot of money in labor cost. It should be obvious that a system using fewer pieces for a given area will be a faster installation than a system using three, four or five times as many pieces.
- Also, it is important to note for productivity that some systems cover the grout line. It is normal when tightening the system down (pushing wedge, screwing down or tightening down cap) that thinset mortar will pump up and fill the grout joint. If you don’t see this during system installation, the next day you are spending a lot of time raking out hardened thinset mortar. Some systems do allow you to see the grout line during installation. If you see thinset fill up the joint, you can remove the cap, clean out the joint, replace the cap and keep going. Then you have saved a great deal of time and labor.
What about lippage control for large, gauged porcelain tile panels? There are new ANSI standards dealing with these large thin panels: ANSI A108.19 and ANSI A137.3. The installation standard requires the use of lippage control systems for these panels. I would refer you to these standards and to check with the lippage control system manufacturer as to the compatibility of their system with the specification requirements.
In summary, lippage control systems may seem to be a toy to many, but they really are a valuable tool for the tile and stone industry. Tile formats are getting larger, grout joints are getting smaller and customers want a flat surface. Lippage control systems make the installer’s job easier and more productive. And it helps both the experienced contractor and those with less experience get the right result — no lippage. It’s up to you to find the best system for your business.
*LEGO is trademark of LEGO System A/G
Looking for a reprint of this article?
From high-res PDFs to custom plaques, order your copy today!


