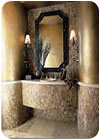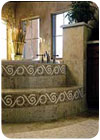
Mosaics are not only aesthetically pleasing, but they also enable an installer to place stone pieces on curved surface shapes. Although mosaics require special considerations for installation, knowledge of some basic points should alleviate many concerns.
Creative, colorful and eye-catching, mosaic patterns are showing up everywhere - from backsplashes to borders and from showers to swimming pools. Mosaics are intricate designs or patterns made up of small tiles (2 x 2 inches or less) or pieces of material that are thinner than conventional tiles. They are comprised of a variety of materials, including natural stone, which is becoming more and more prevalent in today's designs.
While the traditional piece-by-piece fabrication of mosaic designs still occurs, many designs are mounted on paper or mesh fabric sheets (often 12 x 12 inches or 24 x 12 inches) for faster installation. The mosaic material may be face-mounted (often using paper), clear film-faced (plastic adhesive film) or back- and edge-mounted (mesh fabric, perforated paper, resin, polyurethane or other mounting material).
From a practical standpoint, mosaics enable an installer to place stone pieces on curved surface shapes, such as columns, or on the curved walls of a shower or shower seat. The flexibility of the mosaic sheets makes them easier to install in these types of applications than traditional 4- x 4-inch or 12- x 12-inch tiles.

A key consideration to successfully installing mosaics is to match the installation method with the type of mosaic being installed and the substrate.
Installation Challenges
The nature of mosaics can pose installation challenges. Because the individual tiles are so small, it doesn't take much to interfere with the adhesive bond between the mosaic sheet and the substrate. For example, mesh fabric back-mounted material can prevent the mortar from properly adhering to the substrate. The small tiles can also be pulled loose from the wet mortar as the face-mounted material is removed.Although mosaics require special considerations, installers shouldn't be intimidated. The road to successful mosaic projects takes a thorough understanding of how installation products and methods work with various mosaic materials.
Each type of material used in mosaics has different properties. Higher-density stone varieties, such as granite or marble, are often used in mosaic designs because they are less likely to flake or chip after installation, which can occur with lower-density stones due to the small size of the pieces.
While a portland cement mortar may be used to install stone mosaics, latex-modified thinset mortars provide flexibility that allows a secure bond with higher density stone varieties. All stone types require 100% coverage of the bonding material to achieve a successful bond.
A new mortar category, called performance mortar, is formulated to adequately cover many stone types while delivering bond strength. For mosaic wall applications, some performance mortars have non-sag characteristics that support sheets weighing up to 6 pounds per square foot without the use of bracing. Performance mortars are not recommended for installing mosaics made with green marble or other types of moisture sensitive stone.
There are also some considerations regarding the grout used in a mosaic installation.
Unsanded grout is generally recommended for the narrow (1â„8 inch or less) joints found in most mosaics. Unsanded grout also won't scratch the surface of the mosaic pieces.
An acrylic grout additive should be considered for grout used in mosaic installations that may be subject to expansion and contraction from exposure to the sun and/or freeze-thaw conditions. Grout additive is not recommended for natural stone tile.
Installation Methods
A key consideration to successfully installing mosaics is to match the installation method with the type of mosaic being installed and the substrate.Three basic installation methods - direct bond, backbuttering and conventional wet set - are described here. It's best to consult with the mosaic manufacturer for specific installation recommendations.
Direct bond: In the direct-bond method, the mosaic is bonded directly to the substrate (such as cured concrete) with a bonding material, such as a latex-modified mortar or a performance mortar.
Extra care should be taken to apply a uniform amount of mortar under the tiles and then flatten the ridges with the smooth edge of the trowel. This will help prevent the mortar from filling the grout joints. After the mosaic sheet is applied, a beating block and hammer are used to bed the mosaic into the fresh mortar.
If the mosaic sheet is face-mounted, the paper facing material can then be dampened with a sponge and peeled away. Any loose tiles should be immediately pressed back into place. The mosaic can be grouted after the mortar has cured (approximately 24 hours). If the facing is plastic, it's recommended to wait at least 24 hours before removal. The mosaic can then be grouted right away.
Backbuttering: The backbuttering method involves applying a thin coating of mortar to the back of the mosaic sheet to help ensure adequate coverage. This is done in addition to spreading a layer of mortar on the substrate. Backbuttering may be necessary when installing back-mounted mosaic sheets. This is because the mesh fabric that holds the tiles together can interfere with the mosaic sheet achieving a good bond with
the substrate.
Conventional wet set: In the conventional wet set method, a slurry - or bond coat - consisting of sand, cement and lime, is applied to an uncured, still-workable concrete substrate. The mosaic sheets are then installed on top of the bond coat. Any face-mounted paper can be dampened and removed. The installation can be grouted after the bond coat has cured.<
Avoiding Problems
Common installation problems with mosaics include bond failure and unsightly mortar ridges. Here is a brief overview of these problems and solutions:Bond failure: Most bond failure of mosaic sheets stems from one or both of these factors: 1. The bond strength is inadequate for the type of tile. 2. The mortar coverage is insufficient to bond the mosaic sheet to the substrate.
To ensure that a mortar has adequate bond strength, consult with the mosaic manufacturer before beginning installation. To ensure sufficient mortar coverage, consider using the backbuttering method, particularly for back-mounted mosaics with unique mounting materials, such as mesh fiber, resin, polyurethane, etc. Consult with the mosaic manufacturer regarding specific installation recom-mendations.
Also be aware that contaminants on the substrate, such as dust or paint, can cause bond failure if not removed prior to installation and that substrate movement can affect the bonding
of mosaics.
Unsightly mortar ridges: This problem occurs when troweled mortar ridges are visible through the clear or translucent mosaics. It can be avoided by flattening out the ridges before setting the mosaic sheets or by using the backbuttering method.
Mosaic tile manufacturers and installation product manufacturers are excellent starting points for mosaic installation advice. Other industry resources include the Marble Institute of America, the Tile Council of North America and the Ceramic Tile Institute of America.
Mosaic tile installation is an art form, like the mosaics themselves. Successful and profitable installations can be assured through a combination of education, practice and knowing where to find help.

