This scene is becoming more common with the installation of thin stones. Many times, a stone is ordered without the knowledge that a resin backing will be present on the stone.
Now, let's flash back to the jobsite. You call your stone supplier and he tells you this stone always comes with a resin backing and you should have known that. Your next call may be to the general contractor, the project architect or the homeowner - depending on the size of the project - to raise a red flag and alert the parties to the fact that there is an issue that you were unaware of with the stone.
You are now told to proceed because the installation will be fine with the ANSI A118.4 latex-fortified thin-set mortar that was specified. What do you do? Do you take the chance, or do you try to find out more about the stone backing and the application? Through the course of this article we will try to address some of the options that may be available to successfully install these types of materials.
While the stone without the resin backing makes for a straightforward installation, some stones are just too thin and fragile to withstand the rigors of handling prior to being installed.
Types of resins
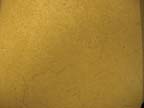
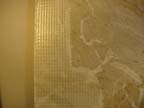
Knowing the type of resin backing on the stone can help to determine if the adhesive mortar being used is appropriate. Take a look at 10 different stones. You may be surprised to see how many stones have various types of backings on them. These backings can be composed of polyester, urethane or epoxy. Some backings can include fiber-mesh scrims. Others may include another thinly cut stone laminated to the back of another stone. The backings are designed to provide rigidity and to stabilize some of the more fragile stone types used on floors. However, these backings can present some challenges to the installer.We would first suggest that you contact the stone supplier to see if they have any special manufacturer's instructions that provide direction for which type of adhesive mortar should be used for the stone that they supply. In many instances, the best results come from installing resin-backed stones with an epoxy-based adhesive.
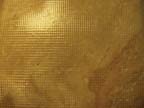
Some stone manufacturers will broadcast a sharp sand or other aggregate into the resin to facilitate better mechanical grip or adhesion to the mortar. When this is the case, a latex-modified mortar may be used. The type of resin used can also influence the adhesive that is used. Keep in mind that there may be countless types and varying quality of resins used on the backs of these stones. Despite that fact, there are three main family types that these resins fall into: polyester, epoxy and urethane.
The polyester types can be somewhat problematic. They are the most common, since they are the most inexpensive type. Polyester resin is generally a cold applied material that is poured or rolled onto the back of the stone. As it hardens, a waxy film develops on the surface of the resin. This very slick material presents a daunting problem for most latex thin-set mortars. Therefore, it is best to use an epoxy adhesive for these types of resin backings.
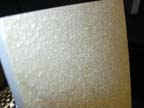
Epoxy resins are of better quality, however, latex thin-set mortars will also have a hard time bonding to these resins. The epoxy resins are generally a two-part product made up of one part hardener and one part resin. This material is generally cold applied, but relies on chemical reaction to cure out and harden. Epoxy adhesives would also be the preferred choice to install these stones.
Urethane backings are probably the type that is least commonly used. If you do run across this type, an epoxy adhesive will also be the best choice to use.
An interesting fact is that there are currently no standards to determine what the minimum bond strength of the resin backing to the actual stone should be. This leaves an installer with the unfortunate task of trying to determine if the stone and backing are suitable.
There is another area of concern when it comes to installing these stones that we want to consider. During your examination of the stone, try to see how well bonded the resin actually is to the back of the stone. You may be shocked to see how easy it is to remove this backing. It is of no use to install the stone if the resin easily peels off the back of the stone. This is a failure waiting to happen.
Other options - vertical applications only
An option that is available if the resin-backed stone will be used for vertical applications is as follows:A few manufacturers of installation materials produce a stone setting epoxy putty that can be applied in a spot bond method. This method mimics the fastening pattern of mechanically anchored systems, where the stone is held in place by spots of mortar at the four corners. Add an additional spot of epoxy mortar in the center of the stone to complete the installation. The resin backing can be ground off at the points of attachment, then stacked, and installed in place on the wall substrate. Contact your adhesive manufacturer for details on this system. You may be amazed at the speed in which the installation takes place. As a side benefit, you get to remove the resin backing, which may be problematic.
General issues
There are several other general issues to consider when installing resin-backed stone. One issue is the stability of the stone itself. If the stone is water or moisture sensitive and prone to curling (usually green marbles and some agglomerates), a 100% solids epoxy adhesive should be used regardless of the resin backing type. Use a white adhesive mortar for white or light-colored stones. Some installers will only use a white mortar regardless of the stone color to avoid confusion on the project site. Always honor expansion joints that may exist in the substrate and bring them through the stone finish. Movement joints should also be placed at the perimeter of the installation, as well as in the field. A good rule of thumb is to follow the Handbook for Tile Installations (TCNA) guidelines outlined in Expansion Joint Detail EJ171. Although this is a tile industry publication, the Marble Institute of America also points back to this detail in its installation manual. Use a suitable flexible sealant that is non-staining and will hold up to the traffic and maintenance that the area will see. Note that most acrylic-type colored caulks are not suitable for these installations.We are all glad to see stone consumption continue to rise. As it does so, the presence of these backing materials will be along for the ride. Many new installation materials and techniques are becoming available to deal with these trends. These materials and techniques are created with the intent of making the installation easier and problem free. Check with your stone and ceramic tile installation materials manufacturer for their suggestions on new products and new installation trends and techniques that deal with these unique issues.
