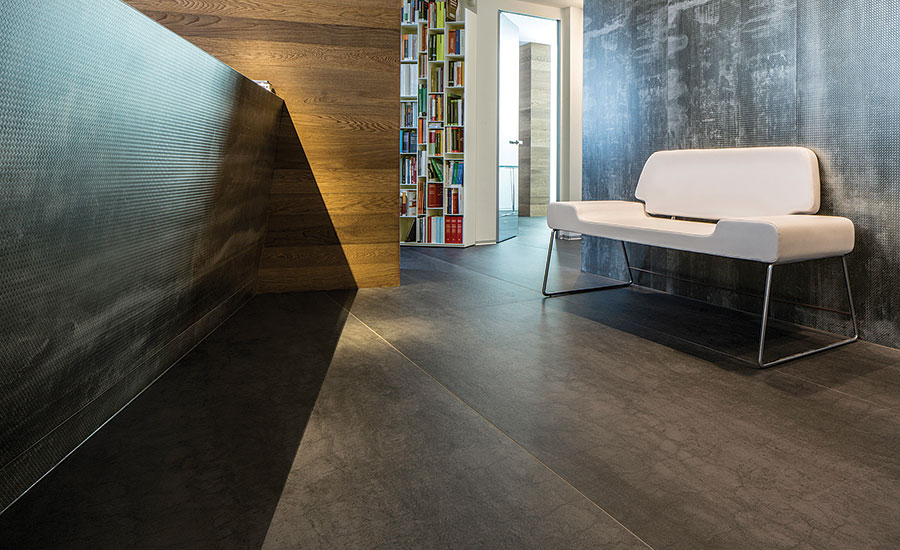
Large-format natural stone tile is in demand for a variety of reasons. Designers like the aesthetically pleasing, open look it gives floors and walls in residential and commercial applications. Consumers like the natural beauty of a large stone expanse and appreciate the easier maintenance resulting from fewer grouted joints. But large-format tile also has its installation challenges. Working with large-format stone requires tighter tolerances in the substrate. In addition, its weight makes it harder to handle in both floor and wall applications.
Advanced installation materials and techniques have improved the overall quality of large-format tile installations while helping to improve the installer's efficiency. Keeping up with the latest in products and techniques will help installers produce aesthetically pleasing - and profitably installed - walls and floors.
How large is large? The trend is toward increasingly larger sizes of natural stone tile, such as 16 x 16 inches. 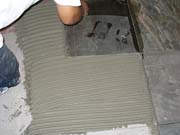 But large-format natural stone tile sizes can vary, depending on the application and type of stone. For example, large wall tile ranges from 12 x 12 to 24 x 24 inches, and stone panels used in commercial and exterior applications can be up to 7 feet long and 4 feet wide.
Considerations
When bidding a job, the installer should consider the following:
Type of application. Is the wall or floor an interior or exterior application? Is it expected to be wet (e.g. a shower or steam room) or relatively dry (e.g. a conference room)? Is it a commercial building or a residence?
Potential use. Will the flooring installation be subject to heavy commercial traffic? Will the stone tile wall be subject to freezing and thawing?
Substrate. Can the intended substrate support the weight of the tile with an acceptable amount of deflection? Is the substrate flat?
Type of stone. Is the specified stone highly porous, such as limestone, or less water absorptive, such as granite? Highly porous stone, especially, will require a sealer to protect the beauty of the installation.
Installation materials. Will the selected materials meet or exceed the requirements of the installation method and not negatively affect productivity?
Flooring installation challenges
Large-format tile presents several challenges when used in floor installations. Some of the common concerns are:
Tile weight is the primary challenge. Heavy stone floor tile that settles into the mortar bed can cause 'lippage' - a condition where one edge of a tile is higher than adjacent edges. The result is a finished surface that has an uneven appearance. In a worst case, it is an uneven floor that causes a tripping hazard.
A substrate that isn't perfectly flat to begin with will exacerbate an uneven floor problem as the tile is installed. The Marble Institute of America's Dimension Stone Design Manual, Version 6 requires a maximum variation of 1â„8 inch in 10 feet for horizontal and vertical thin-bed installations. Variations that exceed this standard should be filled or ground to within tolerance.
Excessive deflection between the joists or trusses of a wood subfloor can cause a flooring installation to fail. The Marble Institute of America (MIA) standard for stone deflection is L/720 - or not greater than 7â„32 inch - of the span when measured under a 300-pound concentrated load. This standard is more restrictive than the L/360 for ceramic and porcelain tiles. Deflection can be an issue if the joist span is greater than 16 inches on center (OC) and greater floor thickness is not addressed.
In addition, it is crucial to achieve secure bonding of the substrate and the natural stone tile flooring. Applying an insufficient amount of material may result in hollow sounding spots. The hollow spot is susceptible to damage from concentrated weight because of a lack of support from the mortar in that area of the tile.
Cracking is a possibility if the tile is bonded directly to concrete. This is because cracks naturally occur as water in the concrete substrate evaporates. These shrinkage cracks can transfer from the substrate and into the bonded tile. Cracking can also occur from improperly installed wood subfloors.
Mortar solutions
Medium-bed mortars are a common solution to support large-format tile and prevent lippage. These mortars are formulated to keep the tile from slumping into the mortar bed and to not shrink as the mortar cures. Often used in installations up to 3â„4 inch thick, medium-bed mortars may require a polymer additive to bond with some substrates. Because medium-bed mortars can be difficult to trowel, installers often add more water, which can adversely affect the mortar's non-slump performance and its bonding ability.
New types of performance mortars prevent large-format tile from slumping and are easier to use than traditional medium-bed mortars. Some of these mortars are formulated with hollow, ceramic microspheres that are not only lighter in weight but produce a ball-bearing effect - resulting in minimal trowel resistance and better labor productivity. The microspheres also provide buoyancy, which helps contribute to the non-slump properties.
Although medium-bed or per-formance mortars are suitable for many stone tile applications, it is important to consult with bonding material manufacturers and stone distributors to select the best installation material for the job. For example, moisture-sensitive stones, such as green marble, must be installed with an epoxy mortar to prevent warping of the stone.
Ensuring a flat substrate
Use of a self-leveling underlayment is the most efficient way to attain a uniformly flat substrate, particularly over a large area such as an entire room. These products are cement-based and may be poured or pumped onto the affected area. Smaller substrate corrections (generally up to 1â„2 inch) may be made with latex-modified floor patch products. To ensure compatibility, the industry recommends that substrate preparation products come from the same manufacturer as the rest of the installation system.
A 6-foot level or a 10-foot straight edge will help measure possible variation in the substrate, and these tools are also useful in making sure that installed tile is flat.
To address deflection of a wood subfloor, be sure that the specified installation method is appropriate for the given joist span. Installation products - such as latex-modified thinset mortars and the new performance mortars - have the bond strength to keep the tile from losing bond.
Toward better bonding
To achieve an adequate bond for large-format natural stone floor tile, the bonding material must evenly and thoroughly cover the area beneath the tile. Use of a large trowel (1/2- x- 1/2-inch square notch or 3/4- x- 3/4-inch rounded notch) will help ensure that the mortar adequately covers the substrate.
A long-standing installation practice is to back-butter each piece of tile. While effective at attaining 100% coverage, it is time consuming and requires extra mortar.
Although back-buttering is still widely accepted, the formulation of the new performance mortars makes it possible to achieve excellent coverage without applying additional material. Some of these new mortars are formulated with very fine particles - or nanostructures - that line up like interlocking puzzle pieces in the wet cement in the mortar to achieve high cohesive strength. Additionally, the ceramic microspheres interact with the cement, resulting in stronger bonds.
When working with large-format tile, following ANSI standards for floor tile installation will provide the best results. These standards call for combing the bonding mortar with parallel ridges and then pressing the tile perpendicular to the comb marks.
Preventing cracks
Use of a crack-isolation system will prevent shrinkage cracks from migrating from the substrate into the installed tile. Shrinkage cracks are a particular concern in relatively new concrete, as an estimated 80% of shrinkage cracks occur within the first year after the substrate is poured.
Crack-isolation systems are available as membranes (sheet, roller-applied liquid or trowel-applied) and as one-step mortars. Crack-isolation membranes are installed directly to the substrate. After allowing appropriate drying time, the tile is set with a supportive mortar such as a medium-bed or a performance mortar. The installation process requires two or three steps with sheet membranes and two steps with roller-applied liquid or trowel-applied membranes.
One-step mortars, which are formulated to isolate cracks and set tile in a single step, may also be used to install large-format tile. These products require less labor and materials than crack-isolation membranes. Some one-step mortars will isolate cracks up to 1/8 inch wide.
Wall installation challenges
Installers also face a variety of challenges with large-format wall tile. Here are some common areas of concern:
Gravity is the primary challenge. The weight of a large-format stone tile can cause it to sag or slip during installation on the wall.
Having a flat (or plumb) substrate is also critical. Again, the maximum tolerance is 1â„8 inch in 10 feet. If this tolerance isn't met, lippage can occur. Wall installation lippage can be both a structural and an aesthetic concern.
As with floors, secure bonding is key to the success of a large-format tile wall installation. The failure of a heavy tile to adhere to a wall can be a potentially dangerous issue.
Moisture between the stone tile and the substrate can also be an issue, particularly if the installation is in a wet area, such as a shower or steam room.
Solutions from mortars and mastics
Preventing large-format tile from sagging or slipping during installation can be accomplished in several ways. A common solution involves use of a special non-sag thinset mortar that is designed to stone tile weighing up to 6 pounds per square foot. Some non-sag mortars require a latex additive, particularly when used in installations that are subject to wet or freezing conditions. The mortar's non-sag benefit also contributes to a thick, gummy nature that can be difficult to trowel.
Other thinset mortars - such as dry-set portland cement and latex-portland cement - may also be used to install large-format wall tile. These require the use of spacers or temporary holding devices during installation. Holding devices are effective aids, but can make the installation a slow-going process.
New performance mortars address the installation issues related to non-sag and other thinset mortars. These products are considerably easier to trowel than non-sag mortars and will support stone tile weighing up to 6 pounds per square foot, thus eliminating the need for spacers. Performance mortars also require no additives or extra mixing time and may be used with waterproofing membranes.
Mastics are another common solution, particularly for indoor, residential applications. They require no mixing, provide quick grab and minimal waste.
Until recently, mastics have been well suited for smaller sizes of stone tile. But slip resistance has greatly increased with the latest formulations. Some improved products are capable of bonding stone tile that weighs up to 7 pounds per square foot. Mastics typically require a 24-hour cure time before grouting. White mastics should be used with light-colored stone.
Because mastics depend on water evaporation to dry, they cannot be installed over waterproofing membranes. Mastics also have limited performance in wet environments, thus making them unsuitable for exterior applications. In addition, mortars are recommended over mastics for commercial construction wet areas. If an application involves marble, use a mastic that is specifically designed for marble installation.
Getting a plumb wall before installation
Patching compounds are recommended for correcting small, uneven wall areas. As with floor substrate preparation, use of patching products from the same manufacturer as the rest of the installation system will ensure compatibility. If a larger correction is needed, the wall can be mudded with metal lath covered by a scratch coat and a brown coat to give it a new flat, level surface. In addition, a 6-foot level and a 10-foot straight edge are valuable tools to measure possible variation in the wall substrate.
Regardless of the type of correction, it is very difficult to correct out-of-plumb walls with mortar or mastic. Corrections must be made before tile installation begins.
Natural stone installations on the wall require 100% coverage of the bonding material. During installation, periodically remove a tile to check coverage. As with a floor installation, spreading the bonding material with the flat side of the trowel promotes good contact with the substrate. Then, the material should be combed with the notched side to attain maximum coverage.
Moisture sensitivities
Some stone types, such as green marble, white onyx and jade, are sensitive to moisture and require special installation consideration. The water mixed with the mortar may cause unsightly staining - or worse, warping of the tile. Therefore, a pure epoxy thinset mortar is recommended for these types of stone. In addition, white thinset mortar is always recommended for use with any translucent stone, such as marble.
Finding help
Does a large-format tile installation have you stumped? If you need help, manufacturers of installation products are a ready source of information. They are the first and best resource for installation techniques used with proprietary products.
For more general information concerning installation specifications, look into these resources:
The Dimension Stone Design Manual, published by the Marble Institute of America (MIA), is a valuable reference for anyone who installs natural stone. The MIA Web site also includes white papers and other helpful resources.
The Tile Council of North America (TCA) issues the Handbook for Ceramic Tile Installation. The MIA references the Handbook for certain stone installations because some of the wall and floor installation techniques are applicable to stone. TCA also publishes the ANSI American National Standard Specifications for the Installation of Ceramic Tile. More information about TCA publications is available at www.tileusa.com.
